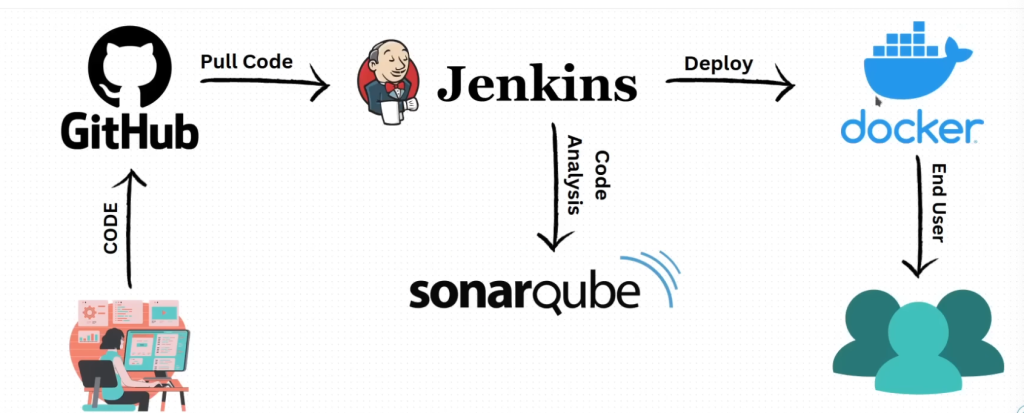
寫了微軟程式這麼久,雖然都是寫功能比較多,對於DevOps界久聞Jenkins大名,但從未真的使用過Jenkins做過一段完整的CICD流程。出於好奇心,找了一部網路影片,結合C# dotnet core的主題,希望實際 手把手try出如何在aws上做完一個low level的佈署過程 。總不好說自己會用 Azure Pipelin就是有做過 CICD ,終究Azure Pipeline也封裝 簡化了很多東西,做起來已經相對簡單一點了,不過缺點也是彈性不夠大加上指令或任務也不夠透明化。這一版本sonarQube先ignore(主要是 做的時候發現無法啟動,待之後再來補強這段)
這一次的專案範例如下 ,不接 db不接 外部服務,純程式的模擬
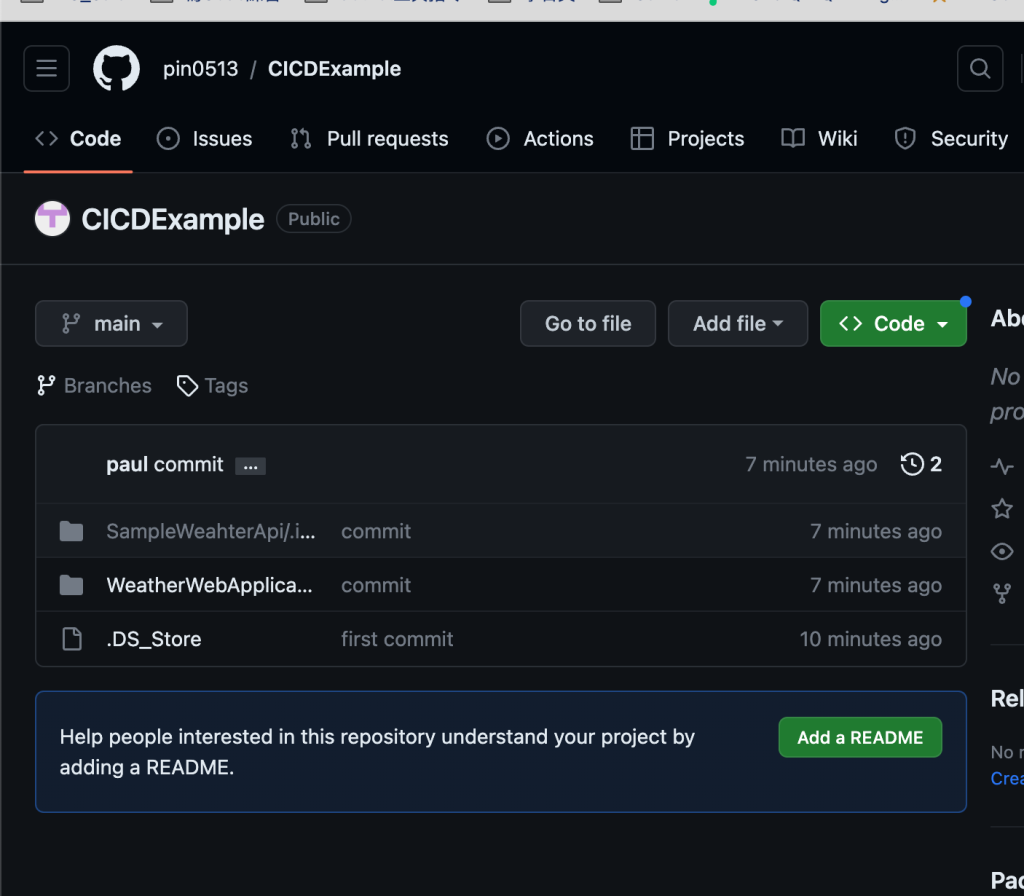
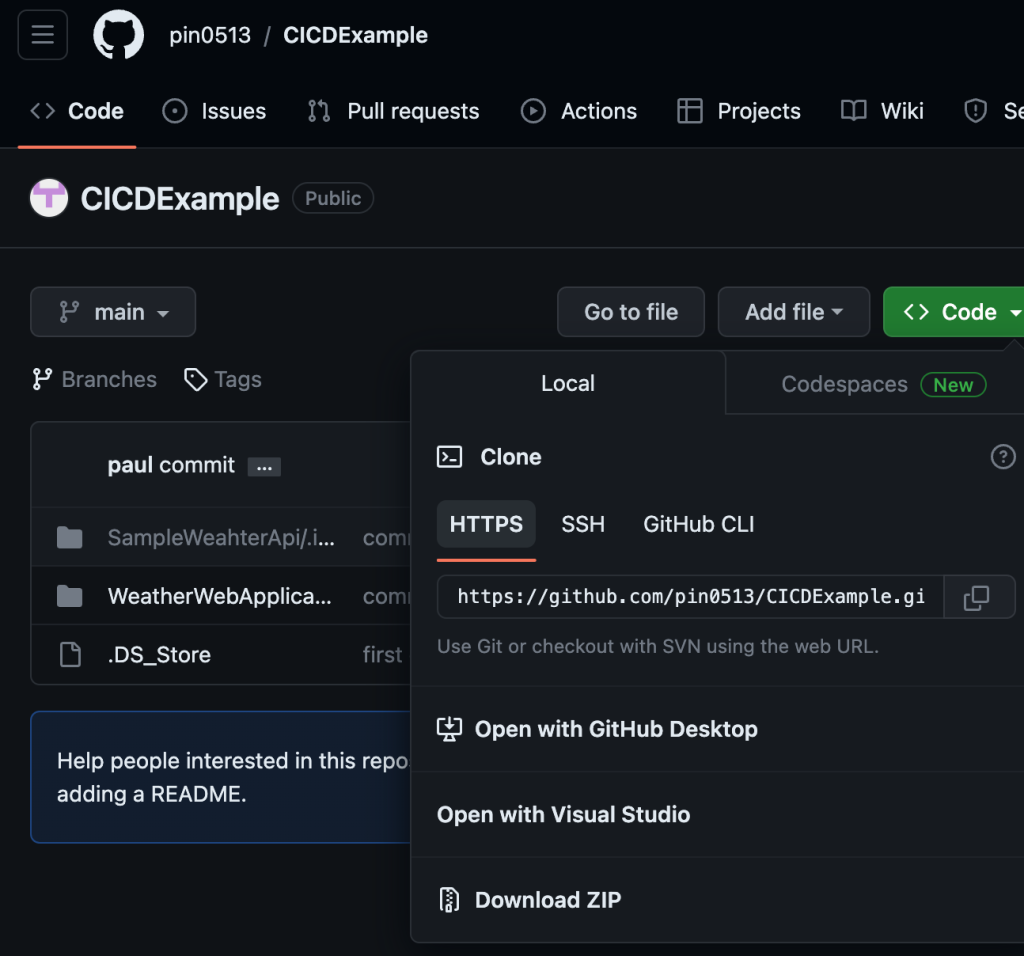
github url: https://github.com/pin0513/CICDExample
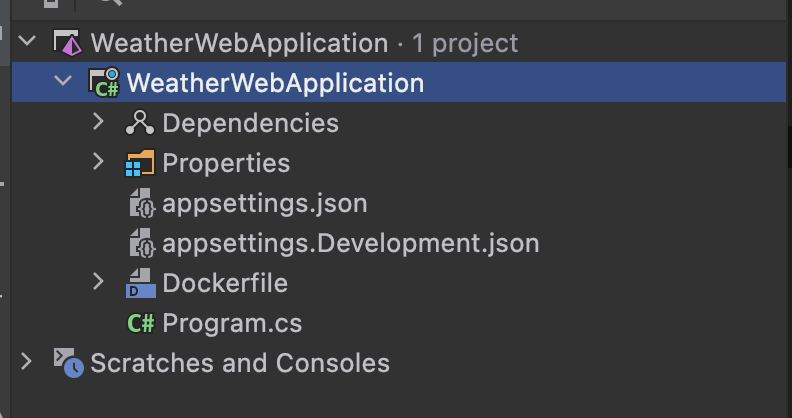
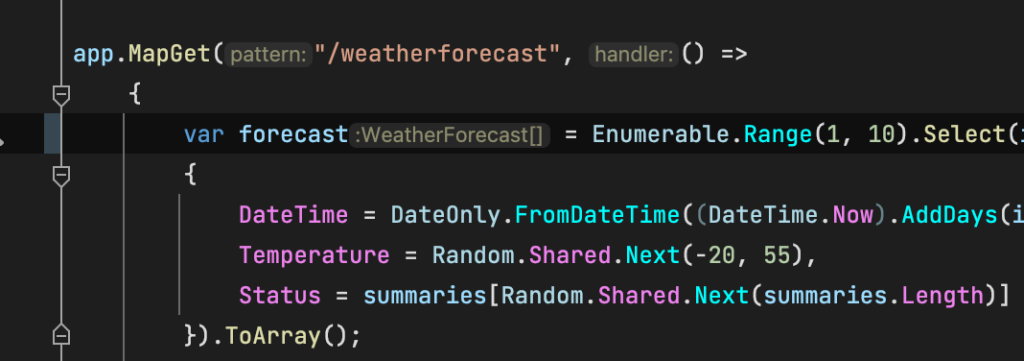
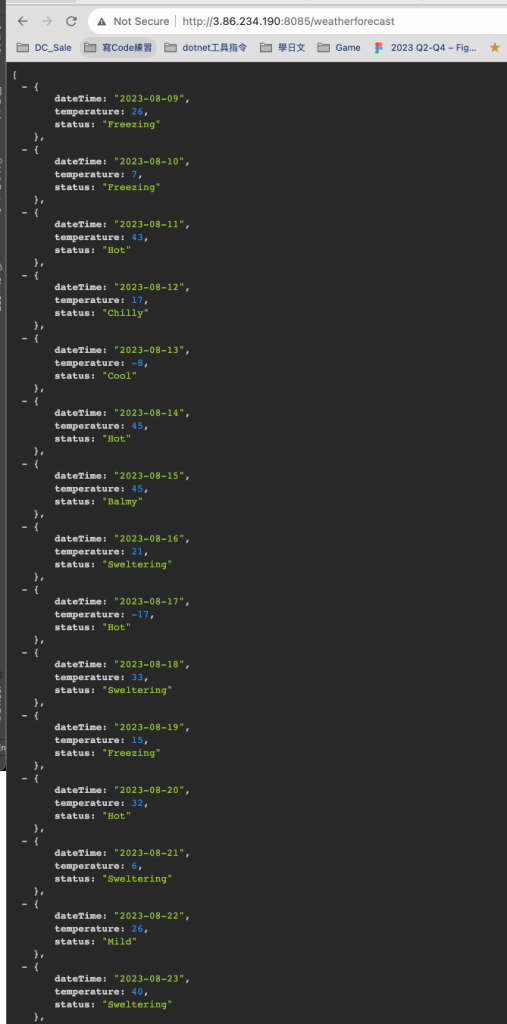
Program.cs的內容是一個模擬未來五天的天氣預測的Api
using System;
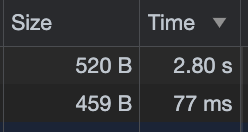
實際跑起來如下 :
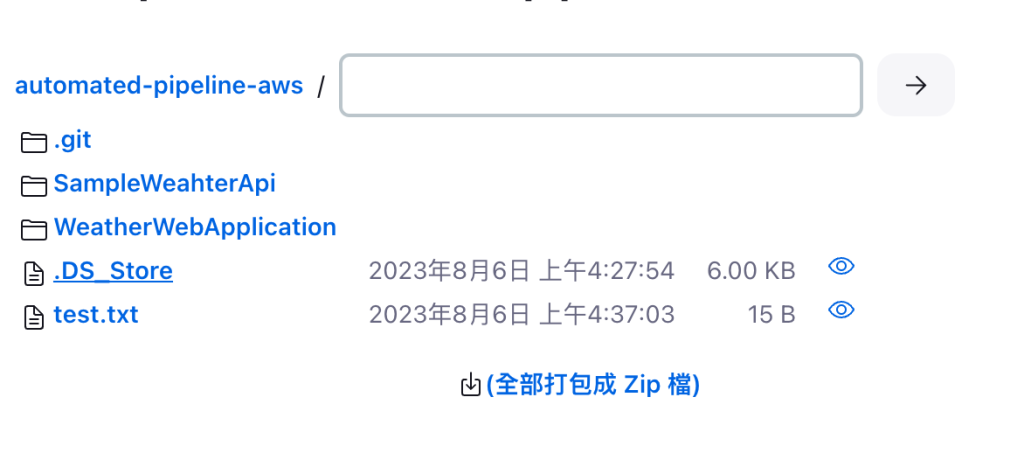
接著我們把他Commit與Push到Github
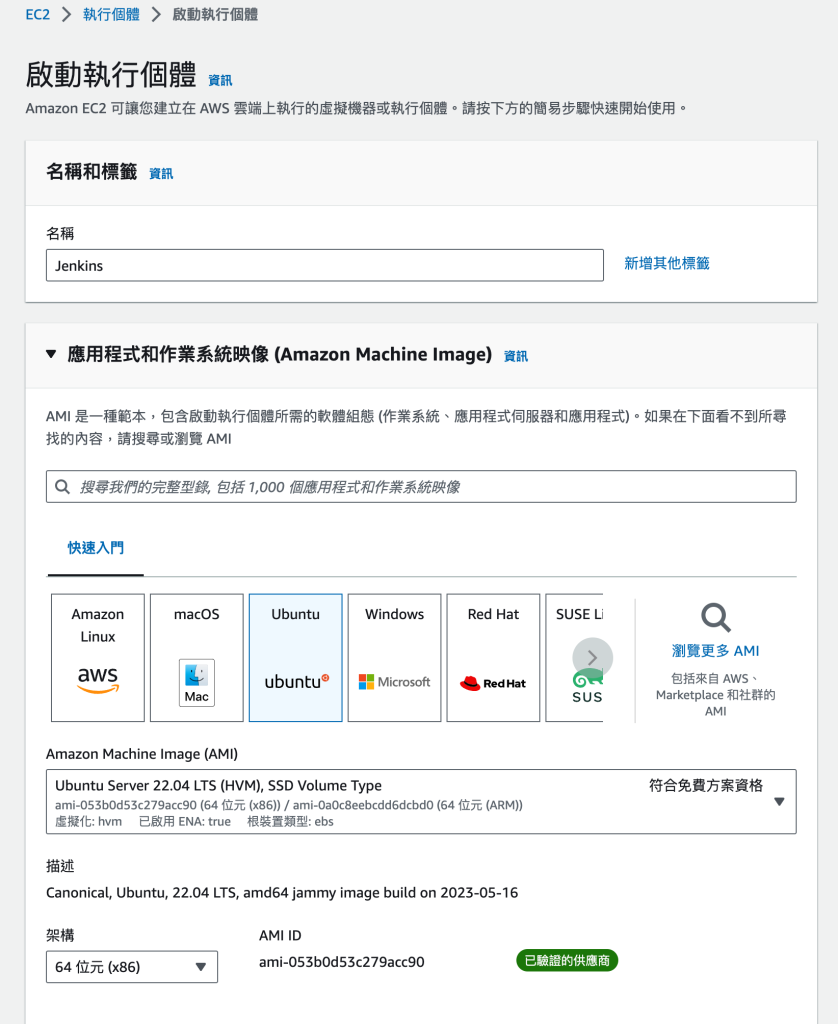
AWS端,我們先創建EC2的VM作為 Jenkins Server
選擇免費方案就好了XD
分別建立3個Instance後如下
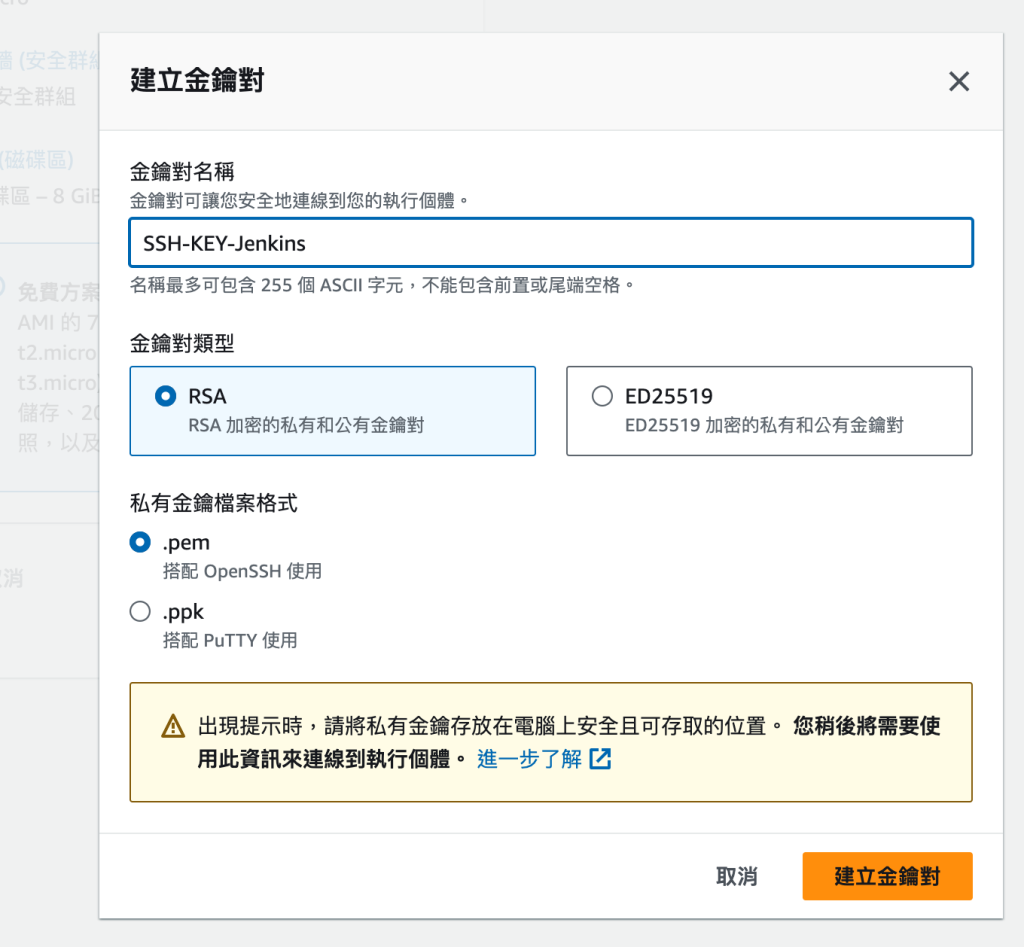
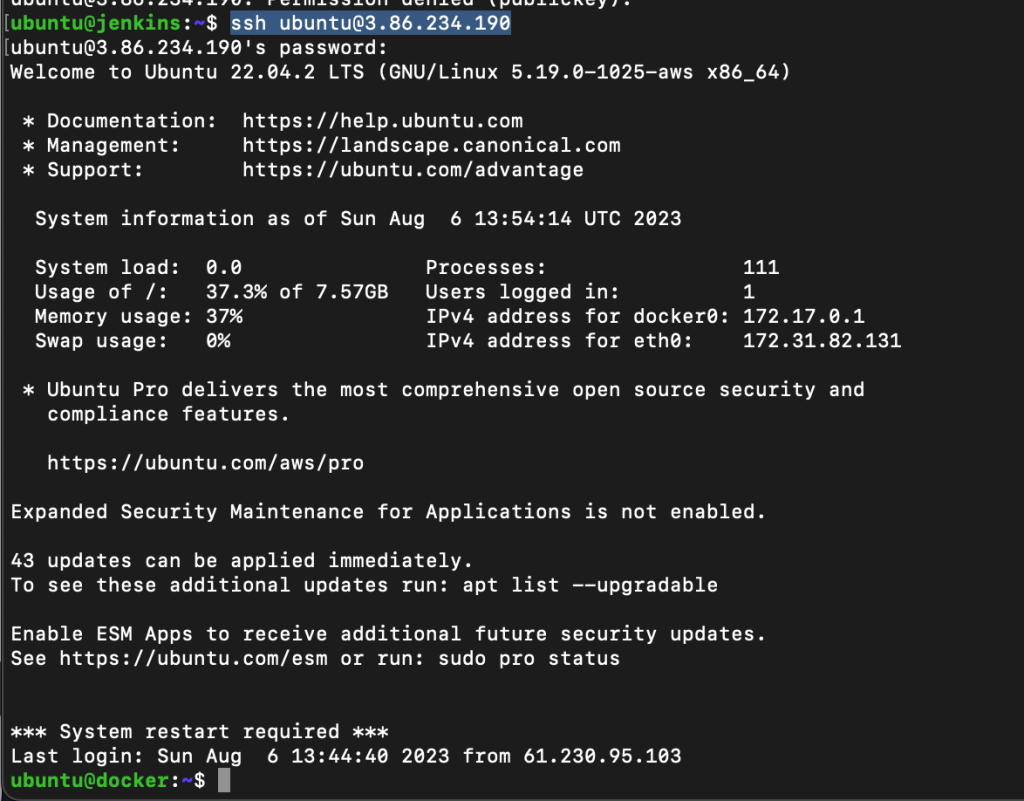
我們透過 SSH連線過去,會先發現
paul@IpdeMacBook-Pro aws-cert % ssh -i SSH-KEY-Jenkins.pem ubuntu
Permissions 0644 for 'SSH-KEY-Jenkins.pem' are too open.
It is required that your private key files are NOT accessible by others.
This private key will be ignored.
Load key "SSH-KEY-Jenkins.pem": bad permissions
[email protected] : Permission denied (publickey).
爆了以上的錯誤,代表你的權限開太大了,執行前必須先將你的金鑰改成無法公開檢視
重新輸入paul@IpdeMacBook-Pro aws-cert % sudo chmod 440 SSH-KEY-Jenkins.pem 以後,就可以ssh過去了
在Jenkins的Vm上依序執行以下指令
sudo apt update
https://www.jenkins.io/doc/book/installing/linux/
curl -fsSL https://pkg.jenkins.io/debian/jenkins.io-2023.key | sudo tee \
/usr/share/keyrings/jenkins-keyring.asc > /dev/null
echo deb [signed-by=/usr/share/keyrings/jenkins-keyring.asc] \
https://pkg.jenkins.io/debian binary/ | sudo tee \
/etc/apt/sources.list.d/jenkins.list > /dev/null
sudo apt-get update
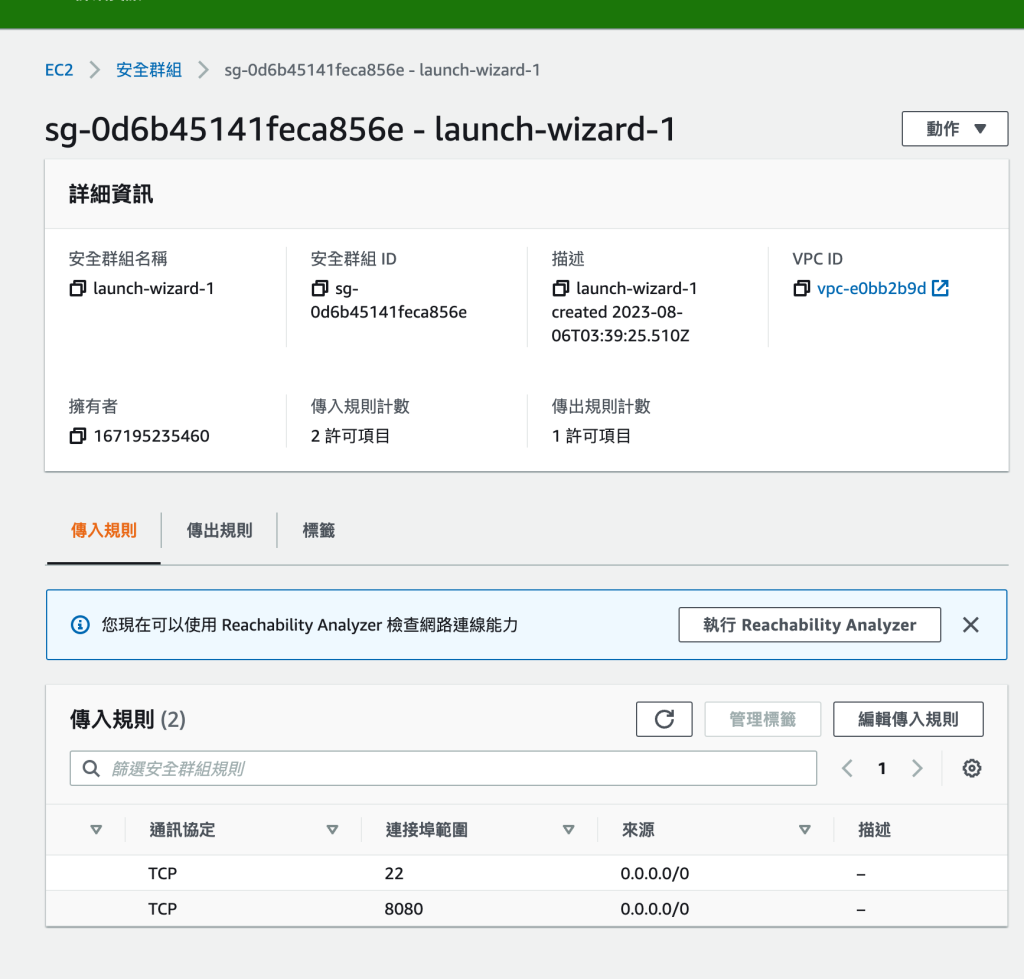
sudo apt-get install jenkins安裝後,接著到EC2端設定 安全性
接著啟動jenkinks
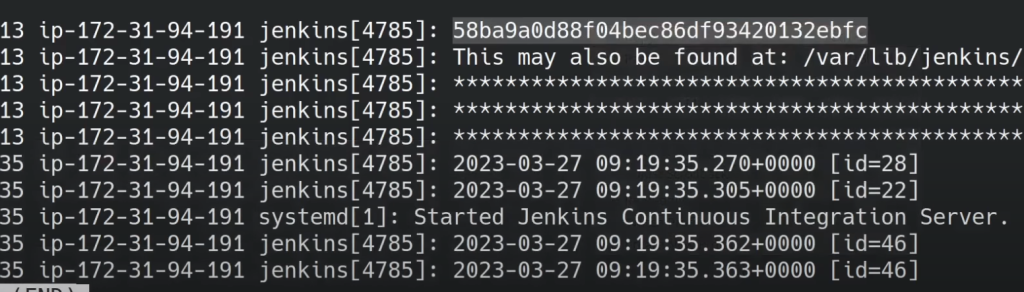
systemctl status jenkins
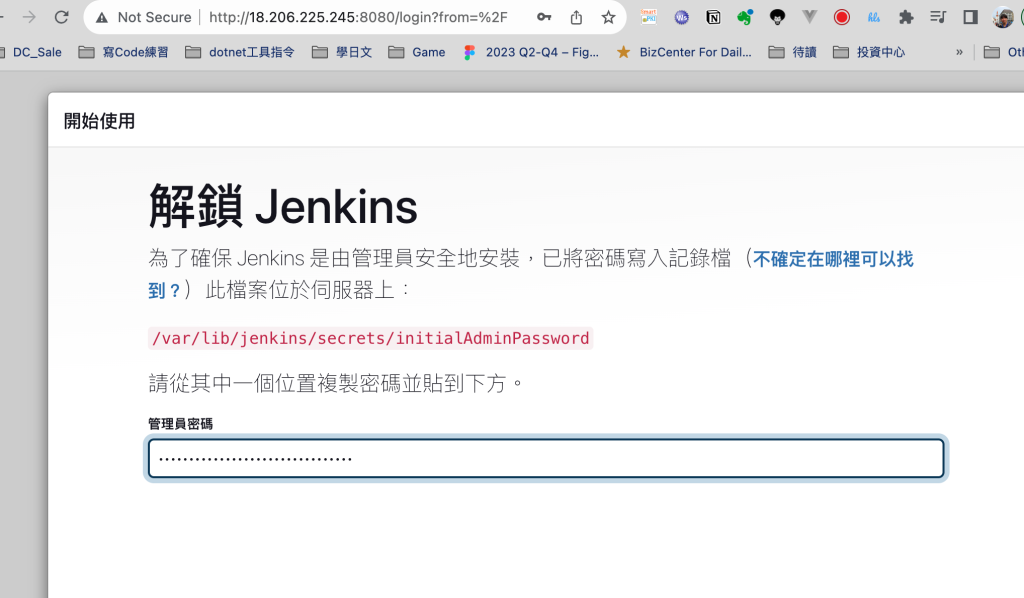
跑起來後,會如下圖,會有token到時拿來登入用的,此擷圖不是我的主機,僅示意,安全性至上!
新的作業 -> enter automated-pipeline-aws
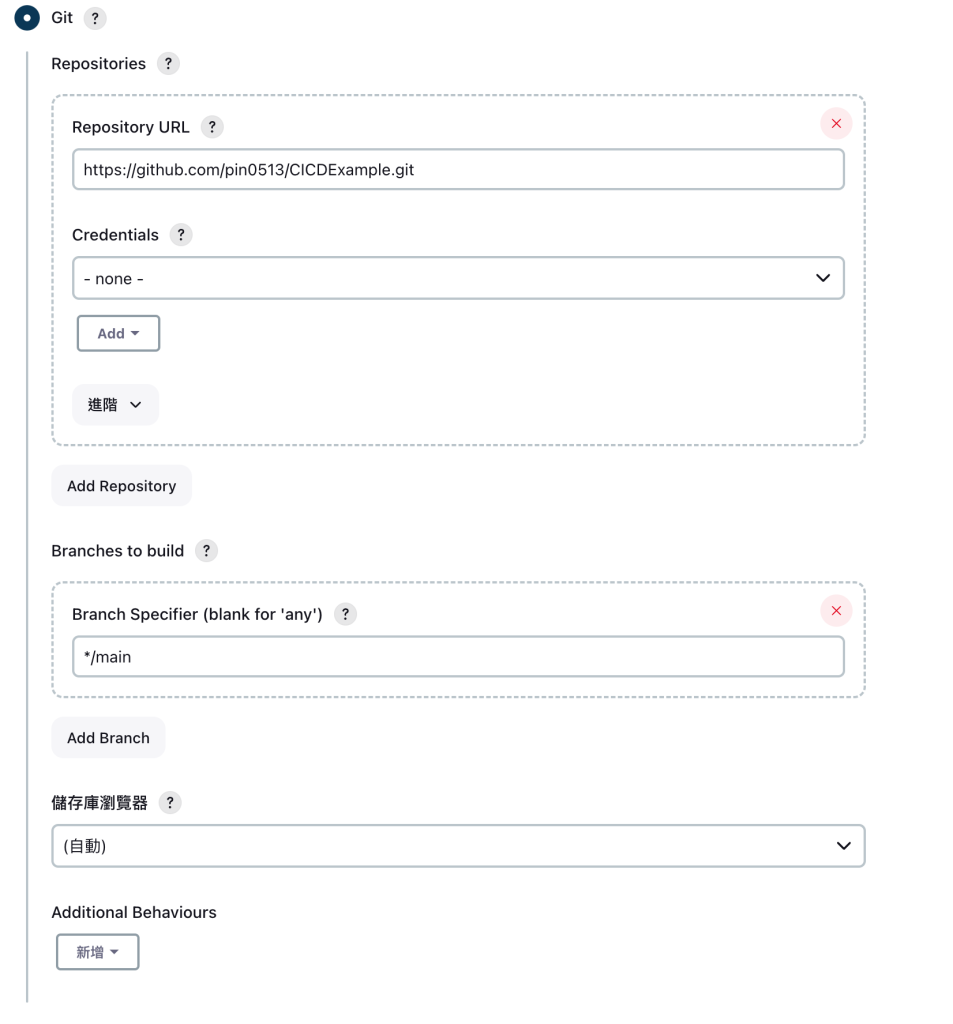
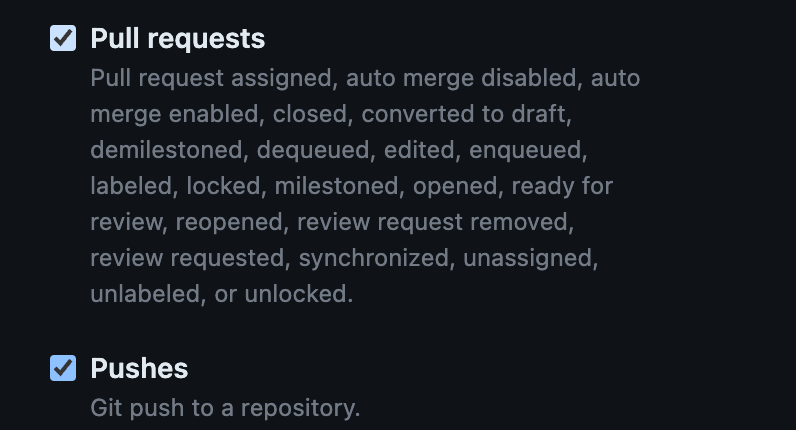
接著到Github專案去設定 Webhook
http://18.206.225.245:8080/github-webhook/ (這邊注意要加/)
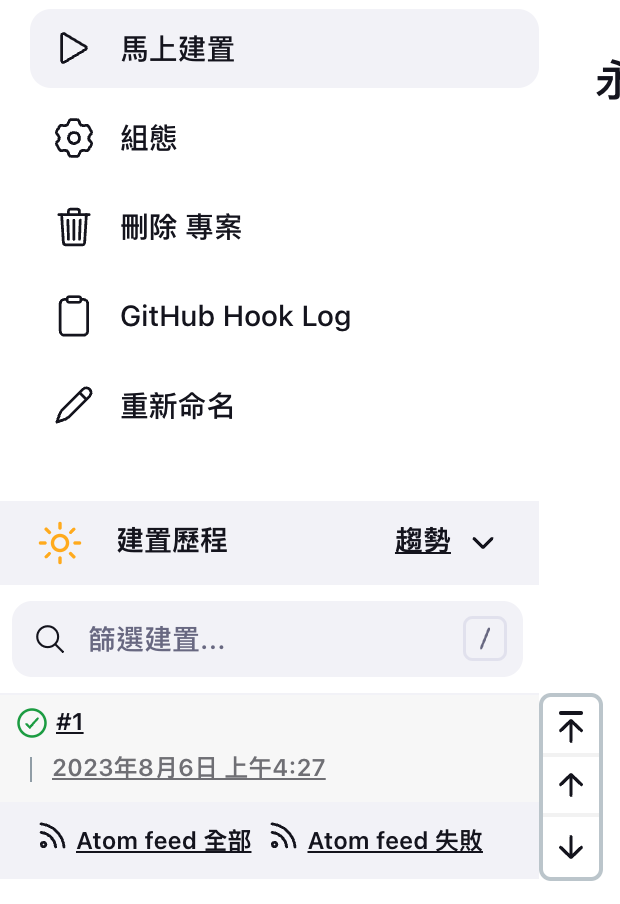
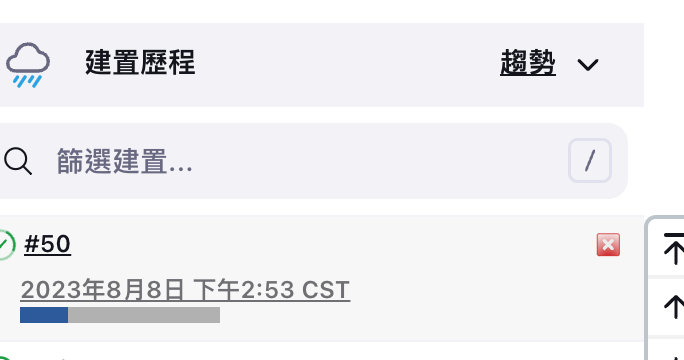
接著到jenkins測試一下,點擊馬上建置
看一下工作目錄,就有包含最早我們commit的方案資訊
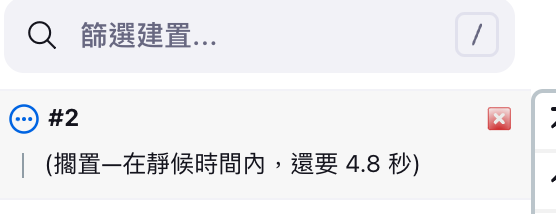
接著到github測試一下webhook
Reference: https://www.youtube.com/watch?v=361bfIvXMBI
建置觸發成功!實際看jenkins的工作目錄也有新的檔案了!
SonarQube Vm透過SSH一樣 的方式登入後,去SonarQube官網下載Community版本
ubuntu@ip-172-31-89-20 :~ $ wget ttps://binaries.sonarsource.com/Distribution/sonarqube/sonarqube-10.1.0.73491.zip
sudo apt install unzipubuntu@ip-172-31-89-20 :~/sonarqube-10.1.0.73491/bin/linux-x86-64 $ ./sonar.sh console
上面指令跑不成功可能是java環境沒裝,所以抄上面jenkins的安裝java指令執行一次
實測Java要裝到18版
sudo apt install openjdk-19-jdk-headless
實際跑起來目前
2023.08.06 05:12:07 INFO app[][o.s.a.SchedulerImpl] Waiting for Elasticsearch to be up and running的問題 (會暫時卡住)
我們先跳過去做佈署到Docker-Server
paul@IpdeMacBook-Pro aws-cert % ssh -i SSH-KEY-Jenkins.pem [email protected]
ubuntu@ip-172-31-82-131 :~ $ sudo hostnamectl set-hostname dockerubuntu@ip-172-31-82-131 :~ $ /bin/bashubuntu@docker :~ $ sudo apt updatesudo apt-get install ca-certificates curl gnupg
必執行
回到jenkins切換 hostname
sudo hostnamectl set-hostname jenkins
ubuntu@jenkins :~ $ sudo su jenkinsubuntu@jenkins :~ $ ssh [email protected] (連到Docker Server)
此時會出現[email protected] : Permission denied (publickey).
這時先回到docker的那台 vm,用 sudo su進去root
再編輯nano /etc/ssh/sshd_config 檔案 (注意: 是sshd_config )
把以下幾個設定啟用 ,反註解後存檔
PubkeyAuthentication yes
重啟sshd : systemctl restart sshd (要在root權限下: sudo su)
同時在 root 權限下 passwd ubuntu這個帳號設定密碼
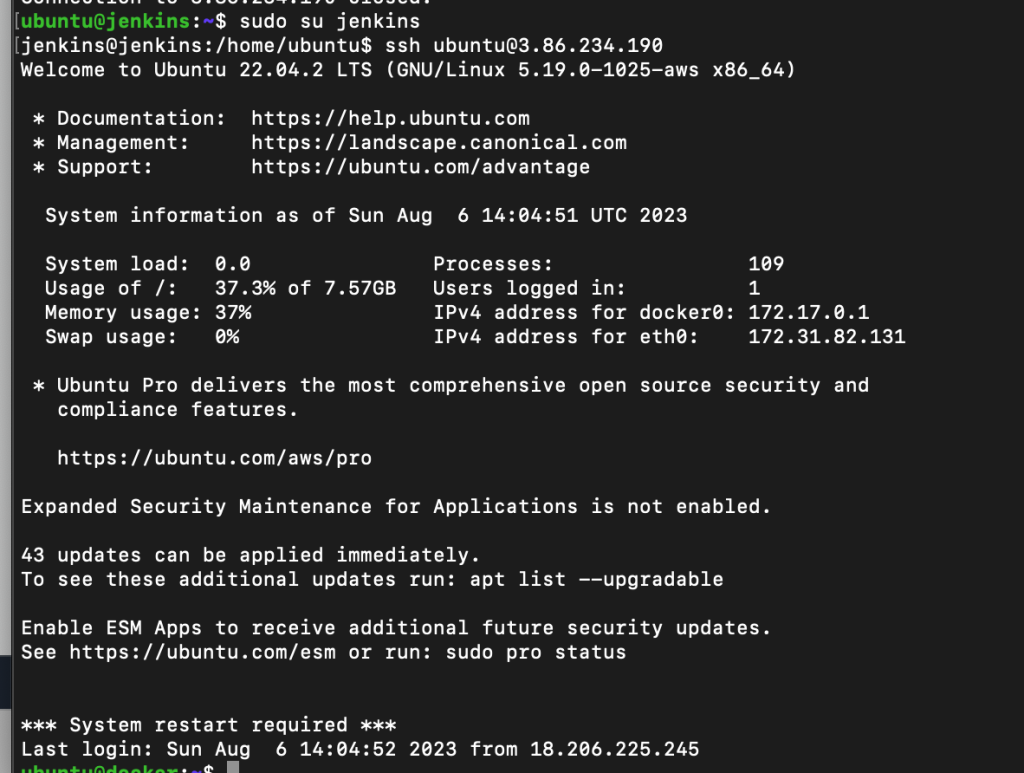
測試jenkins可否連到docker~
ssh [email protected]
若可以連線並驗證密碼通過就會像上圖
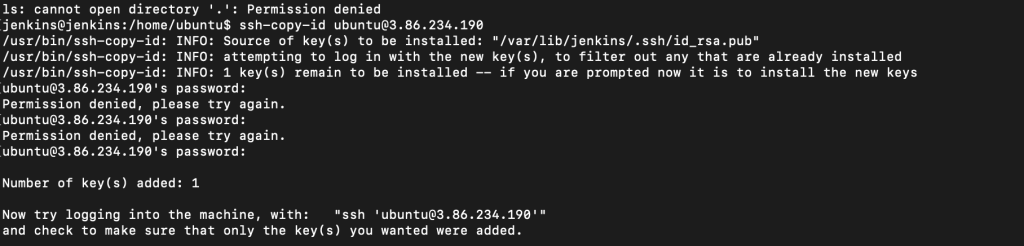
回到jenkins的vm透過sudo su jenkins切到jenkins的user透過ssh-keygen產生一個key
接著ssh-copy-id [email protected]
經過了上述的行為,我們透過了jenkins這個user去生成了一個ssh的key加到了docker的server
也就是我可以直接在jenkin vm這台透過 jenkins這個user執行ssh不用密碼就可以跟docker互動
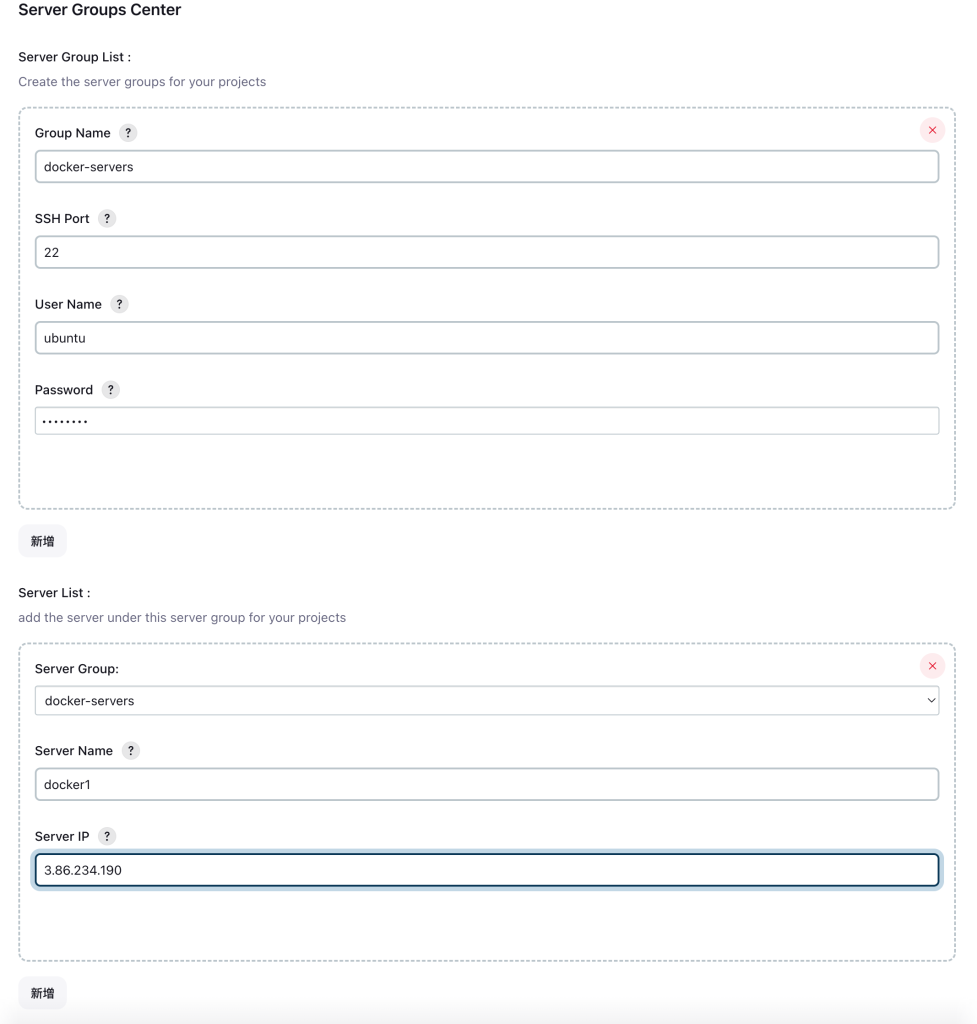
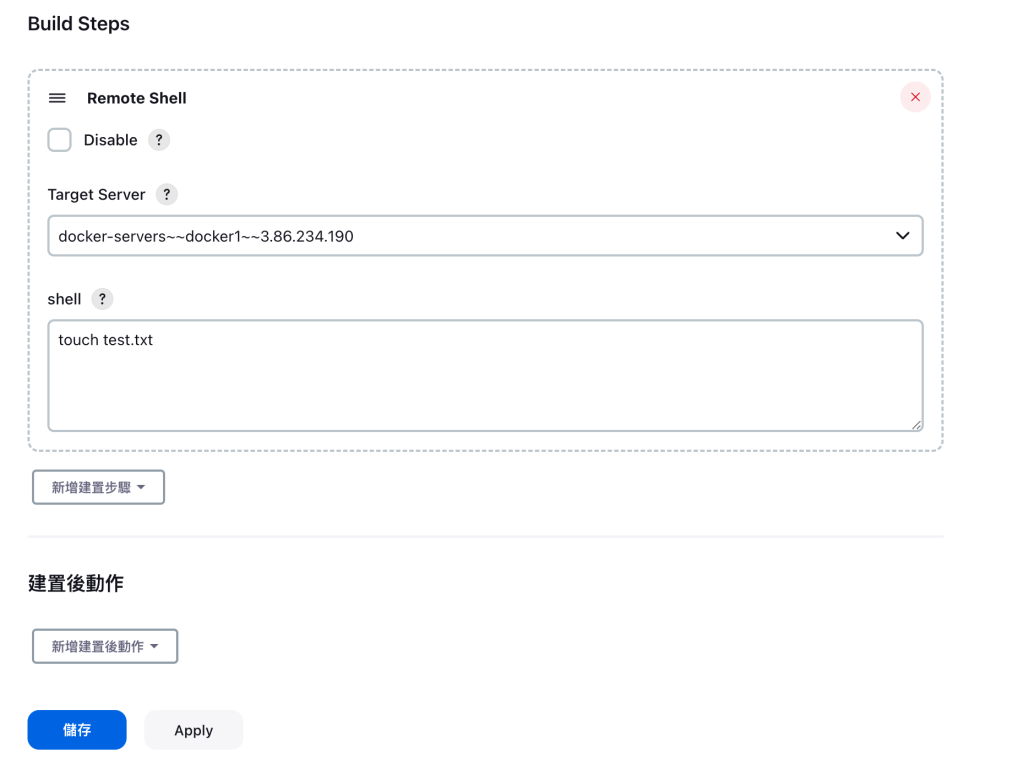
接著我們試著透過 jenkins的管理去設定佈署的docker server
管理 Jenkins => 安裝 ssh2easy的plugin(因為影片中用的就是這個)
設定ServerGroupsCenter
組態中我們可以先試著用 remote shell做一個指令看看
馬上儲存來建置看看,實測如下,有確實執行指令
實際上也有帶上來!!
jenkins建置 C#的準備
sudo apt-get install -y dotnet-sdk-7.0
sudo apt-get install -y aspnetcore-runtime-7.0
sudo apt install nuget
sudo apt install zip
我們預計從Jenkins發佈程式後,上傳 zip到docker-server去處理
建立Build Steps
執行 Shell
dotnet publish ${WORKSPACE}\\WeatherWebApplication\\WeatherWebApplication.sln -c Release -o out -r linux-x64 --self-contained
執行 Shell
cd out && zip -qr output.zip .
Remote Shell
touch ${WORKSPACE}\\WeatherWebApplication\\out\\output.zip
最後我們設定一個
建置後動作 Delete workspace when build is done(這個是一個plugin)
上面的建置過程中我曾經發現他會一直出現以下錯誤
error NETSDK1005: Assets file '/var/lib/jenkins/workspace/automated-pipeline-aws/WeatherWebApplication/WeatherWebApplication/obj/project.assets.json' doesn't have a target for 'net7.0'
後來發現,我雖然裝的是net7的SDK,但是在obj的project.assets.json中有綁到target: net8.0的配置,而且 obj目錄不小心commit了,所以我後續使用上面的delete workspace when is failure做清除後
再重新建置一次,這時改成is Success再清就好了,因為若是失敗的話,就還可以檢查問題
所以jenkins在工作目錄的操作預設是只會做覆蓋。所以錯誤的配置調整後,可能還是會錯誤這點在釐清問題的時候還是要看一下。
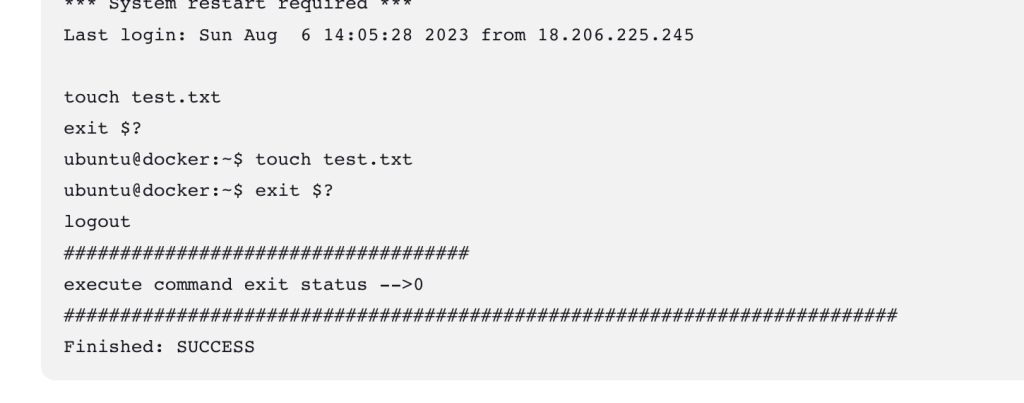
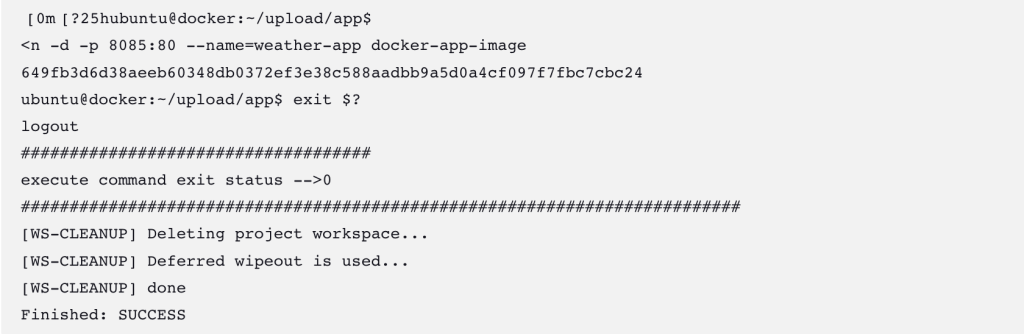
####################################
execute command exit status -->0
##########################################################################
[automated-pipeline-aws] $ /bin/sh -xe /tmp/jenkins16435309995668868877.sh
+ cd out
+ date +%F
+ mv output.zip output-2023-08-08.zip
+ date +%F
+ scp /var/lib/jenkins/workspace/automated-pipeline-aws/out/output-2023-08-08.zip [email protected] :~/upload
[WS-CLEANUP] Deleting project workspace...
[WS-CLEANUP] Deferred wipeout is used...
[WS-CLEANUP] done
Finished: SUCCESS
終於建置到移轉到docker-server,也看到docker-vm上有我們scp過去的檔案
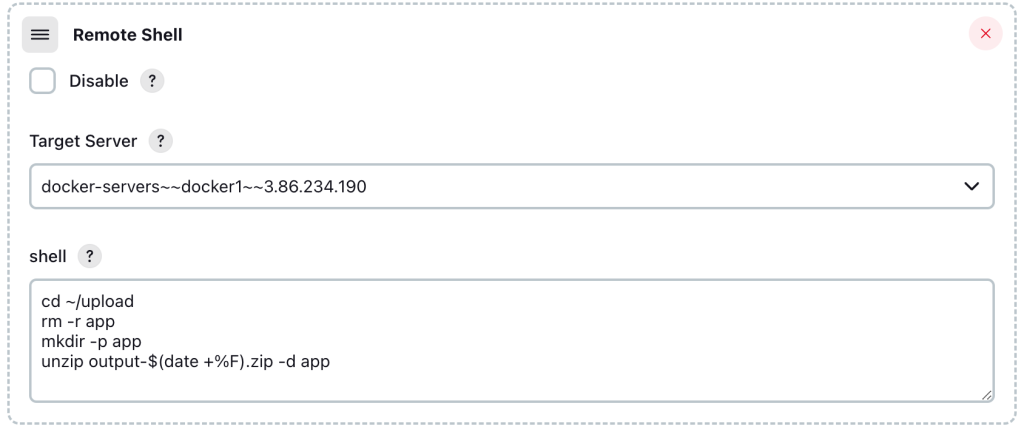
接著我們嘗試加入一個Remote Shell
這一段主要是希望透過編碼可以做到整理Deploy上去的zip檔案。未來可以做版本備份的概念,但其實期望應該是可以做到日期流水編,這邊先簡單用日期做
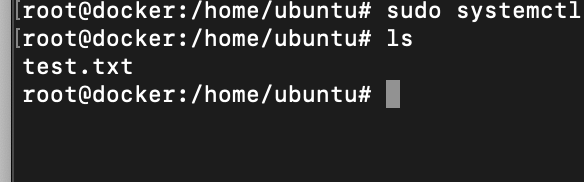
在Docker-Server端為了設定權限,加上以下的script
ubuntu@docker :~/upload/app $ sudo usermod -aG docker ubuntuubuntu@docker :~/upload/app $ newgrp docker
做到不用sudo 可以執行docker
因為.net core在Docker的相容性已經有目共睹了,所以這邊索性調整Sample Project給的DockerFile
FROM mcr.microsoft.com/dotnet/aspnet:7.0 AS base
WORKDIR /app
EXPOSE 80
EXPOSE 443
FROM base AS final
WORKDIR /app
COPY *.* .
ENTRYPOINT ["dotnet", "WeatherWebApplication.dll"]
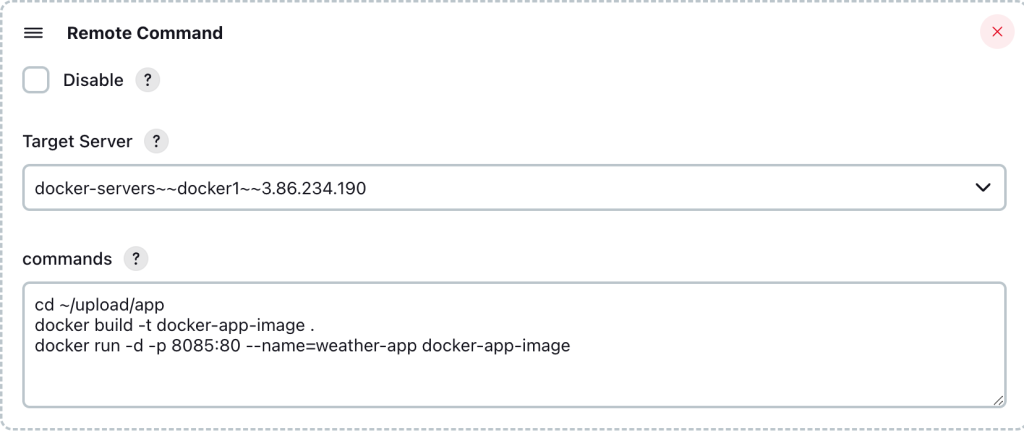
註: 測試Jenkins時,建議都先 在linux主機上驗證,通常 可以跑的指令 在jenkins上不太會出錯。透過Remote Shell定義Docker Command
經過幾次調整後,終於可以運作了
因為是綁8085 port,所以docker server的安全性設定要開放8085 port
大功告成
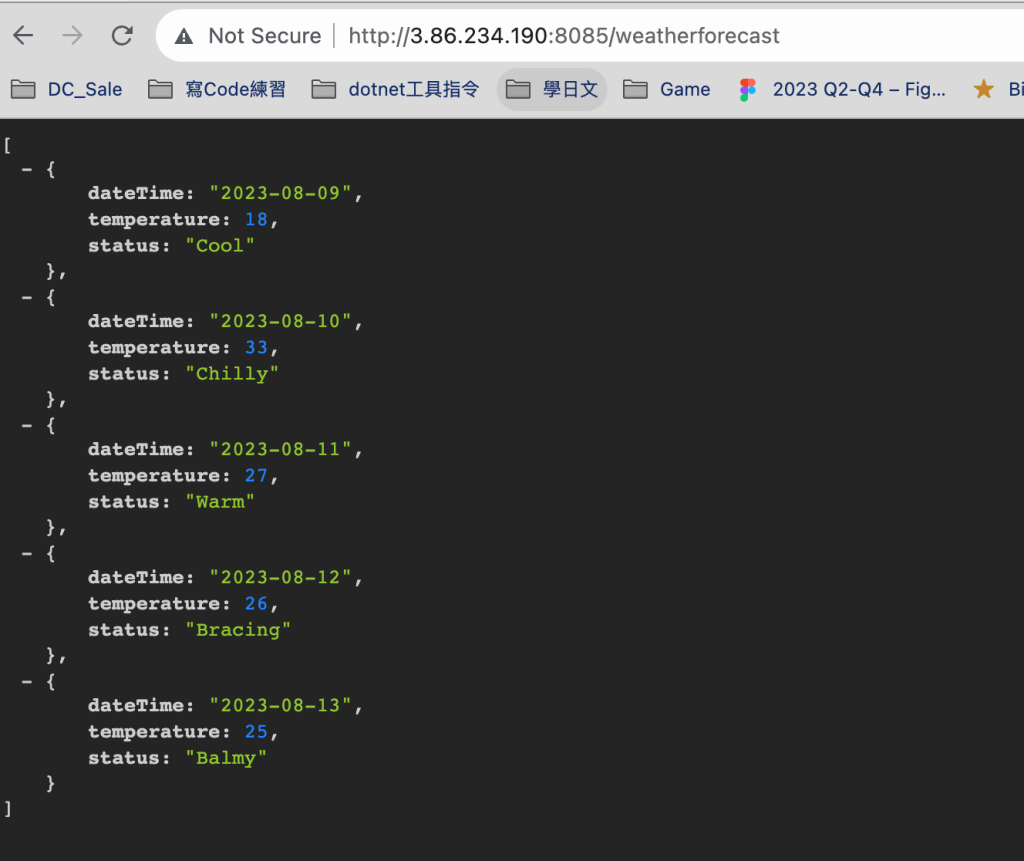
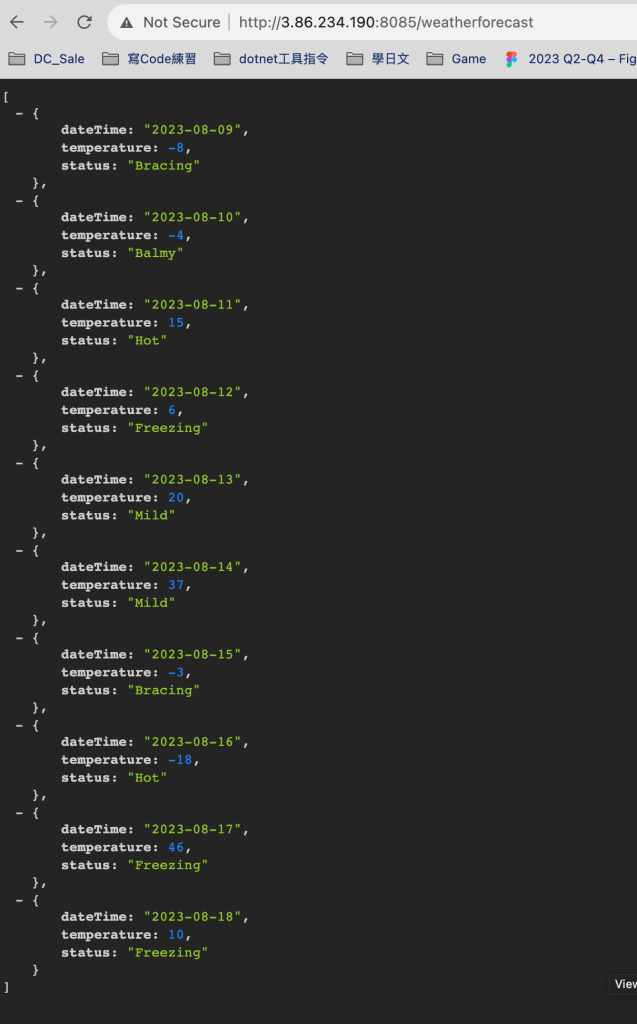
我們試試看改程式後,整個運作起來看看正不正常
Enumerable 從1-5筆改成1-10筆
Push後,一路觸發了
哈!馬上建置失敗
因為Docker 的name已經重疊了,無法建立,為了簡單驗證,所以調整一下docker run 的shell,先 停止再 重新run,設定如下(–rm實測無法動態移除存在的container,所以我先改成stop再 rm):
cd ~/upload/app
docker build -t docker-app-image .
docker stop weather-app
docker rm weather-app
docker run -d -p 8085:80 --name=weather-app --rm docker-app-image
最後成功了!!
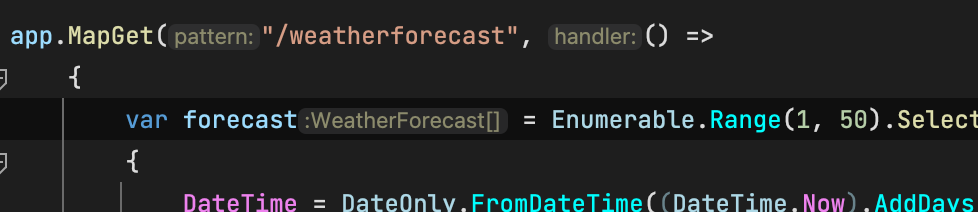
改成50筆也不是問題
讚啦…
首次手把手建立C# .net core程式透過jenkins模擬 CICD的流程 ,雖然還沒自動呼叫單元測試,但也算是解決了自已長久以來好奇的部分細節。
不過實務上每個細節都還有很多改進空間(廢話),例如cd的部分不太可能像我這邊用 stop的方式 中斷 服務,應該是能透過 Docker Swarm或是K8加入node的方式,也要更提早考慮封裝image的問題。以確保不是在prod環境才進行封裝,而是在stage封裝 後在 其他環境pull下來的image已經是穩定的。
這次的案例雖簡化許多,不過能打通一解我心中長久之謎,在很多細節真的是需要一一擊破,僅作為筆記 記錄此行~~